Learning correct ISO setting isn’t hard. In fact ISO is one of the easiest camera settings to learn. The main reason for changing the ISO setting is to enable photographers to shoot images quicker.
The faster your camera ISO, the faster your shutter speed and the sharper your images will be. There is less chance of unwanted blur due to camera shake and more chance of freezing your subject in an instant.
Therefore, choosing correct ISO setting will help you to shoot sharper images.
Shutter Speed versus ISO Setting
So what is a fast ISO camera speed? The higher the ISO number the faster the speed. For example ISO 800 is faster than ISO 100. The ISO setting determines how sensitive the camera sensor is to light.
The higher the ISO setting the more sensitive it is to light, the faster it takes the shot.
You would think that if a high ISO number equates to a faster shutter speed, then you should use a higher ISO for every shot? Wrong!
High ISO camera settings is one of the main reasons for grainy images (also referred to as being noisy). It may not be obvious when looking through your cameras rear LCD screen, however you will understand what I’m talking about when viewing your photo in its full resolution on your computer monitor.
Therefore a high ISO should always be the last resort. Instead try lowering your aperture f-number, then if you find your camera still isn’t shooting fast enough, increase the ISO number.
The correct ISO setting you need to set, should be a mix between speed and photo quality. You need to be able to weigh up the available light, then set the lowest possible ISO setting that allows you to shoot quick enough so not to blur the subject.
Over on our facebook page this week we had quite a few questions regarding correct ISO setting.
Agnel asked these questions
What is ISO? How does it affect photos? In which situations should we use different ISO settings?
While Arefin asked:
What ISO is best for daytime verses night time?
These questions are best answered by studying the example images below.
Examples photos of numerous ISO settings
Shown below are several photos for you to visually learn from. For each photo I’ve also listed what ISO setting I chose to use and why.
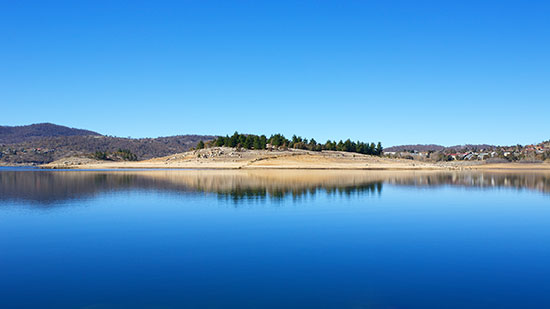
Lake reflections photographed with ISO 100 taken during the day time in perfect lighting conditions. During the day time in perfect sunny conditions always set your ISO to 100.
This correct ISO setting is fast in these situations, even for hand held shots, which will result in the best image quality possible.
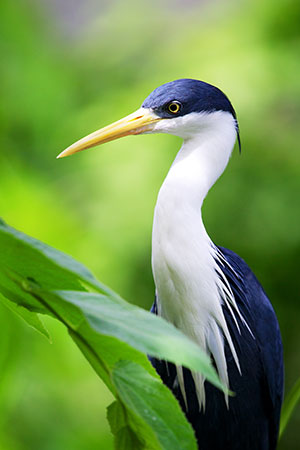
A bird photographed in shady conditions with an ISO setting of 500. During the daytime in sunny conditions when photographing a subject covered by the shade of a tree, I always set my ISO to 400 for starters.
Once I’ve set my camera ISO, I place my eye to the rear vision and go to take a shot. When I do this, I look along the sides of the screen for the shutter speed. The purpose of this is to make sure the shutter speed is faster than the mm length of the lens.
For example, if you are using a 100mm lens length, your shutter speed needs to be at least 1/100th of a second. If the focal length of the lens is zoomed out to 400mm, your shutter speed needs to be at least 1/400th of a second and so forth.
This how you determine if you are choosing correct ISO setting for that particular scene. If it is slower than the length of your lens then increase the ISO higher by 100 and try again. This method also works for zoo animals or people standing in shade on a sunny day.
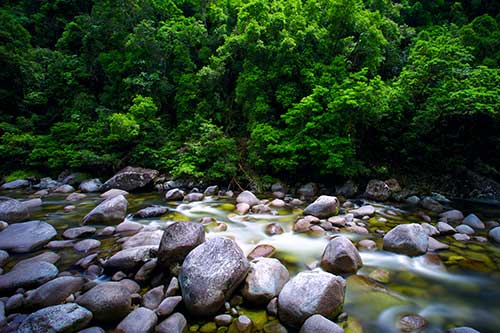
Rainy Days
Treat rainy days the same as subjects in the shade. If it is a rainy day, overcast day, early morning or just before dusk, then set your correct ISO setting to 400 for starters. If you find it’s not fast enough to capture your subject without blur, then increase it by 100 until you find the perfect balance.
Note when recommending the correct ISO setting for shady conditions or rainy days, I’m also presuming your Aperture f-stop is set to around f/4 or there about. The reason why I can’t give you an exact correct ISO setting is because no two light situations are exactly the same.
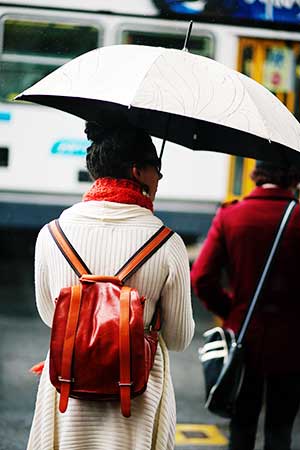
This image above was taken on a rainy day with an ISO set to 100. I was able to set it to 100 only because I had a fast lens that was set to Aperture f/1.8. If you don’t have a lens that goes down that far in Aperture, then start at ISO 400 for these types of lighting conditions.
Night Time ISO Settings
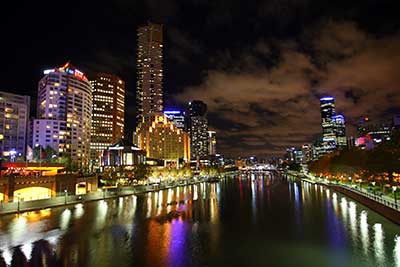
Night time walking around the streets taking snapshots without a tripod, I always set my camera ISO to 800 for starters. It is the only way to get a sharp night photo while hand holding the camera. This also presumes there is plenty of street lighting available and your Aperture f-number is the lowest possible.
Shooting Indoors Without Flash
I also start with ISO 800 generally when photographing indoors without your flash.
When photographing people indoors, it’s important to give yourself the best possible chance of getting a sharp shot, by placing your subject against some sort of available light.
For example, if indoors during day time hours, place the person near a window or in an area where there is natural light falling on them.
If it’s night time in a restaurant or in your home, place the person so you, as the photographer, are shooting into an overhead light. If you do this and keep your Aperture f-number low at the same time then you may be able to shoot lower that ISO 800.
As we discussed earlier, it’s a fine balance between sufficient camera ISO speed and image quality.
Correct ISO Setting – Image Quality
Whenever image quality is of the utmost importance, always shoot with an ISO 100 setting. Now remember in low light situations, this will mean your camera will also shoot much slower than if you used a faster ISO 800 for example. Therefore you will need a tripod if using ISO 100 in low light.
I always use ISO 100 when photographing landscapes that I intend to print out as fine art. Unless it is a sunny day, the shutter speed will be slower, however the image quality will be perfect.
There are many reasons why photographers intentionally set a slower ISO speed in low light. For example, you can slow down flowing water, or show motion in a moving object. For times like these you would choose the lowest ISO number possible.
Just Get The Shot
Set a high ISO number as the last resort if you want to capture people or kids on the move. If you have already set the lowest Aperture f-number your lens will allow and you are still seeing blurry images, then start increasing your cameras ISO setting to compensate for fast movement.
Again, remember the higher you set your ISO the faster your camera will take the shot. However the disadvantage is you also lessen the image quality. As the photographer you need to choose what’s more important, speed or quality. Do you want the shot or not?
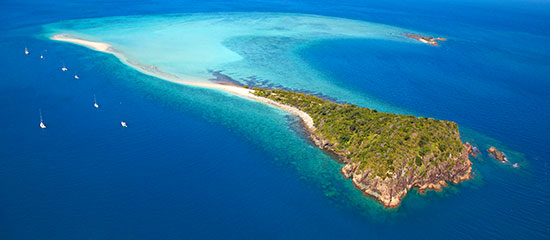
Generally speaking, the majority of new cameras coming out today can easily shoot at ISO 400 and not have any visible image quality issues. This is why I always set my ISO to 400 for aerial and underwater photography. I know my camera will shoot fast and the image quality will still be great!
Sign-up for our online photography course and learn how to master your digital camera in easy to understand “at your own pace” lessons.
Click here for more information and sign-up details!