How to photograph animals is often one of the first questions beginner photographers want to know.
Most people have pets or birds in their backyard, so there is no need to venture too far from home to find a suitable animal to photograph. This makes animals one of the best subjects a beginner can photograph while learning how to use their digital SLR camera.
Here are our best tips to photograph animals. Whether it be your family pet, animals at the zoo, or animals in the wild, the technique for photographing them is basically the same.
What is the best lens to photograph animals?
You will definitely want a telephoto zoom lens to photograph animals. You’ll need to be able to zoom in and out to suit the movement of the animal. Prime lenses (set focal length) may work for pet photography, however you will need to physically move yourself in and out, which in my experience only excites your pet, making it harder for you to photograph them.
If you are photographing a family pet, birds in your backyard, or animals at the zoo that are in close distance to you, a lens that extends from 70 to 300mm focal length is sufficient. My favorite non professional lens is a Canon EF 70-300mm f/4-5.6 IS USM.
This lens is super sharp and great for traveling as it’s not too large nor too heavy when compared to the white L models. A Nikon alternative might be the 70-300mm f/4.5-5.6G ED IF AF-S VR Nikkor Zoom Lens. Sigma and Tamron also build lenses within the 70-300mm length range.
Cropping for online viewing
It’s important for beginners to understand that many animal photos they see online taken at 300mm focal length are usually cropped for online viewing. It’s common for beginners to become disappointed when their new telephoto zoom lens doesn’t have as much reach as they expected.
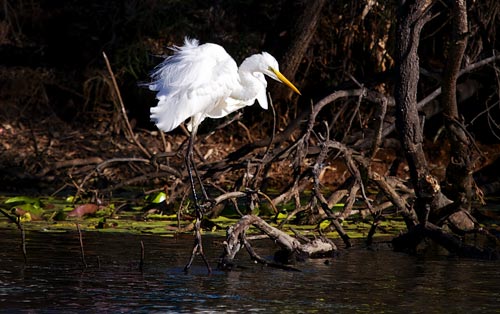
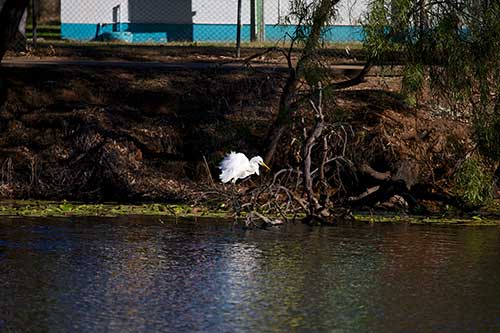
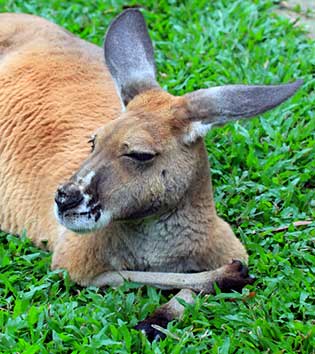
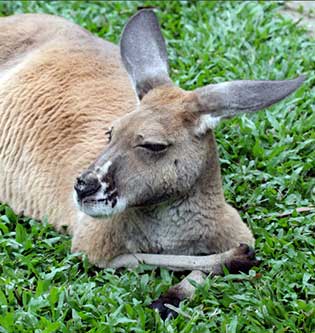
Take the two images below for example. The first is how I would crop it for online viewing and printing. The second is the original image photographed at 300mm focal length. The second photo is what you should realistically expect from a telephoto zoom lens if you are standing roughly 50 meters from the subject.
Lens upgrades
While I was perfectly happy with my 300mm focal length lens, I decided a few years back to upgrade it to a 400mm focal length. I found this more suitable to photograph animals, especially for bird photography or zoo shots where the animal may be a further distance from you. When I crop images taken with a 400mm focal length, the cropped size is much larger with nicer detail.
When I photograph animals, I now use a Canon EF 100-400mm f/4.5-5.6L IS USM Telephoto Zoom Lens. While my partner loves his Sigma 150-500mm f/5-6.3 AF Telephoto Zoom, he still prefers the Canon EF 70-300mm f/4-5.6 lens for traveling. Purely because its smaller and lighter to carry.
Are extenders good for animal photography?
If you already own a shorter lens like a 200mm focal length, I definitely recommend extenders. However it is important to understand that photos shot with extenders are never as sharp as those photographed without them. Therefore if you are going to use extenders, I recommend purchasing professional lenses with matching brand extenders. This way you can be assured the extender was created specifically for a high quality lens.
When buying extenders to photograph animals, you also want to make sure it is compatible with your lens autofocus system. Do your research. Don’t automatically presume that if you own a Canon lens that a Canon extender will be fully compatible. I found this out the hard way myself years ago. The last thing you want is to be manually focussing on a moving animal.
Camera settings for animal photography
Personally I use two different camera settings when I photograph animals. In short, if the animal is stationary choose Aperture Priority. If the animal is moving, choose Shutter Priority.
If the animal is non moving, as in your family pet sleeping or a bird perched in a tree, I recommend setting your camera to Aperture Priority. Aperture Priority is also my preference for photographing animals at the zoo. Rarely are zoo animals moving around quickly. Aperture Priority allows you to choose how much of the animal and its surroundings you want in sharp focus.
I set my Aperture to f/8 when using a focal length of 400mm. This ensures the animals whole face is in focus, from its nose or beak, back to its eyes. I find if I set a smaller f-number, more often than not I’ll have either the nose / beak or eyes in focus, but not both. Personally I like both in focus when photographing animals.
When using a 300mm focal length lens, I set my Aperture to f/5.6. This usually has the same effect as f/8 on a 400mm focal length that I mentioned in the paragraph above.
Moving Animals
If the animal you are photographing is moving, for example a pet dog running or a flying bird, then set your camera to Shutter Priority. Some beginner models may have a sports mode also which will work similar to Shutter Priority.
Shutter Priority allows you to choose the speed your camera will take each shot. to photograph animals and pets, I recommend starting with 1/60th of a second shutter speed, take a few test shots, if your pet looks blurred try a faster speed until you find the correct setting. For birds in flight and other such animals, I recommend starting with 1/1000th of a second shutter speed.
When photographing animals keep your camera ISO settings to no more than 400 for beginner models, or 800 for everyone else. This will ensure the animals eyes are nice and sharp. Sometimes if you set a camera ISO higher than these settings, the animals eye may seem hazy. Having said that, if you are photographing in low light situations you might need to increase the camera ISO higher than 800. Sometimes it’s best to photograph a grainy shot than not to get it at all.
General tips: How to photograph animals
Here are some general tips for animal photography apart from camera settings and lens choices already mentioned.
- When photographing animals I always look at the background before the subject. As soon as you put your eye to the rear view finder, look past the main subject and at the background instead.The background seen in any image can make or break how a viewer perceives the photo.
- In my experience, any photo has the potential to be great, if only the photographer took more notice of the background elements.
- Background problems to look out for are trees, branches, wires, or any objects that may look as though they are cutting through the animals head or body.
- You want to try and avoid those sorts of objects in your backgrounds. It can be as easy as simply shifting your physical position. Instead of photographing the animal head on, photograph it from the side.
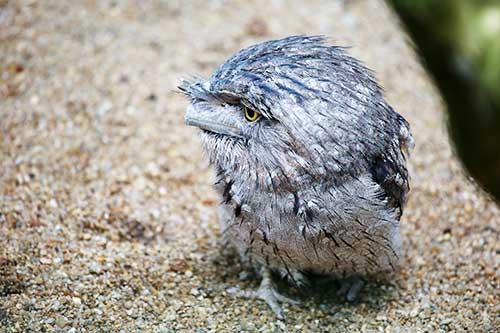
- Experiment with different Picture Styles (check camera manual).
- I find Neutral Picture Style is the best setting when photographing brown or earthy colored animals.
- If you shoot in RAW image format, you can always change this setting in post processing. This is often the best way to learn what Picture Style you personally like for each situation.
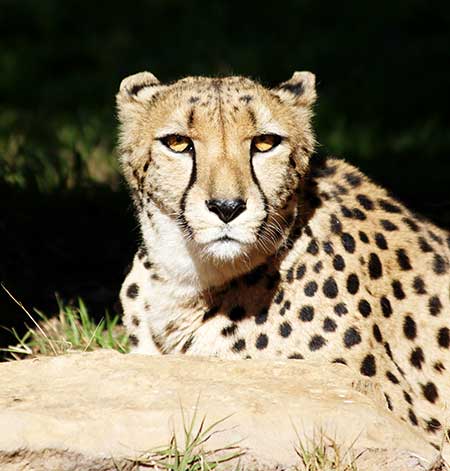
- If you look at the two images below. The first was taken with Landscape Picture Style. I find this style often adds an unnatural reddish color to animals.
- The second one photographed with Neutral is more natural in color.
- Experiment with different metering modes. Changing your cameras metering mode can result in more detail seen in the animals fur or feathers. I recommend reading another post I wrote earlier on Spot Metering where I go into this in more detail.
How to photograph your pet dog
Families love photos of their kids and pets, preferably together. One of the best pieces of advice I was given by a professional pet photographer was to learn how to bark! Yes it will look silly, but chances are the child will naturally laugh and the dog will look inquisitively directly at you with its head tilted and one ear up in the air. It’s a win win situation. Especially if you do it while you are shooting. You need to capture that exact moment the dog notices you barking.
For maximum impact get down on the animals level, no top of the head shots. Unfortunately this means if you try the barking tip, also get ready to be bowled over by an excited family pet.
How to photograph animals at the zoo
- My best tip for photographing animals at the zoo is to grab a brochure on what times each animal will be fed. Turn up 15 minutes prior and you’ll find it’s also the time zoo animals are most active. Captive animals are trained animals. They know what time of the day they are going to be fed.
- Zoo animals are also a lot like humans. Once they have had their daily feed they like to curl up and sleep. This is not the best time to photograph animals at the zoo. 9/10 of my best zoo photos were taken in the morning when animals are at their most active.
- The best zoo photos are those where the animal is looking directly at the camera. I’ve known zoo photographers to sit for days on the same animal until they get that perfect eye to eye contact shot.

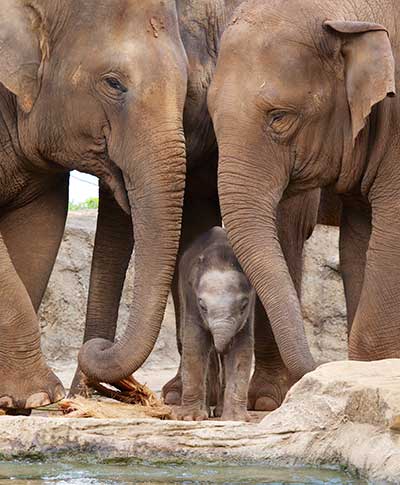
- I love photographing baby animals at the zoo. It’s the best time to capture quirky awkward photos of animals. Photograph them close-up surrounded by family. Tightly cropped shots of baby animals framed by their parents are always great sellers on Microstock

So there you have it, our best how to photograph animals tips. Hope this helps you take better photos of animals and pets.
Online Photography Course
Sign-up for our online photography course and learn how to take better photos in easy to understand “at your own pace” lessons.
Click here for more information and sign-up details!