This article will explain when to use your cameras exposure compensation setting. Have you ever taken a photo to find it darker or lighter than you wished it would be? Exposure compensation tells the camera that a photograph needs to be lighter or darker than the automatic calculated exposure.
 Some cameras have a button similar to this +/- symbol. If you don’t see this symbol on your camera body, you may need to use a circular dial instead to adjust the exposure (check your camera manual). On canon cameras you may see a Q button on the back near the LCD screen. Press that button and navigate to the exposure line to adjust it.
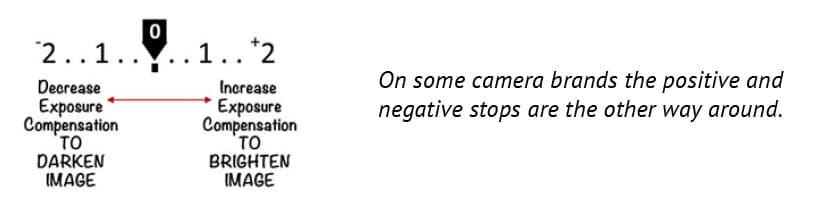
Exposure compensation is measured in stops. A photograph shot at +1 exposure will have recorded twice as much light (or be twice as bright) as a photograph shot at 0.

Note, exposure compensation does not work on full AUTO or Manual mode.
Remember on AUTO mode the camera has full control of the settings. It is not needed on Manual mode because you can already adjust the exposure line to your liking. i.e on manual mode you have full control.
Here are a couple of examples of when you might like to use exposure compensation
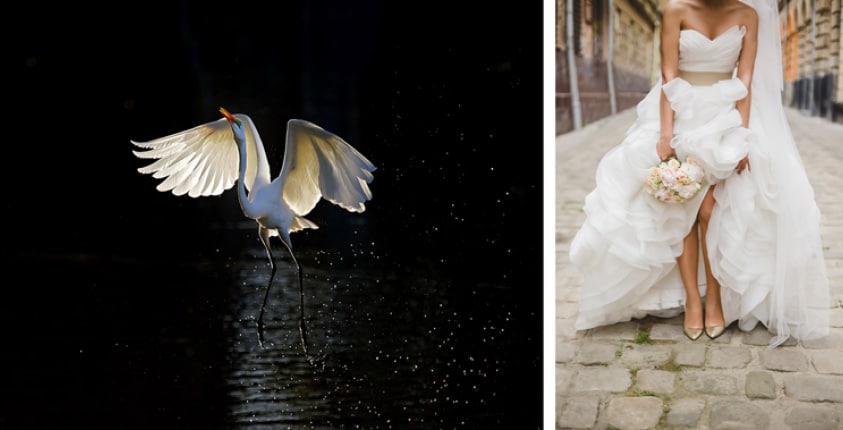
White subjects against darker backgrounds set -1 or -2. When photographing a white bird against a dark background, the camera will usually expose for the dark colours. This may result in the bird being over-exposed, throwing out the details of the white feathers. In this scenario it’s best to use -2 exposure.
The same technique and reasoning applies to brides with white dresses. The last thing you want is a bride with a washed out dress!
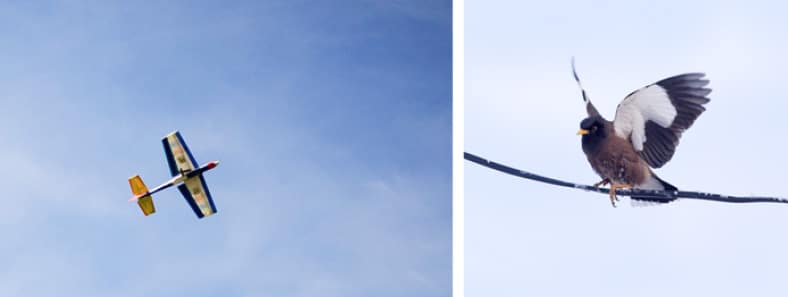
Birds or planes against a blue sky set +1 or +2
When photographing birds or aircraft in flight, your camera will generally expose for the sky, leaving the subject dark in comparison. This is a scenario where you may want to use a +1 or +2 compensation.
When photographing landscapes try -2/3rds
A technique many landscape photographers use is to set an exposure compensation between -1/3 and -2/3rds. This ensures as much detail is captured in the landscape as possible, including the highlights. They know they can then bring out more detail in post processing than they would have had the image been over exposed in some areas.

For beach or snowy landscapes, experiment with setting +1
A beach or snowy landscape frequently confuses your camera’s meter, often resulting in darker images than most would like.

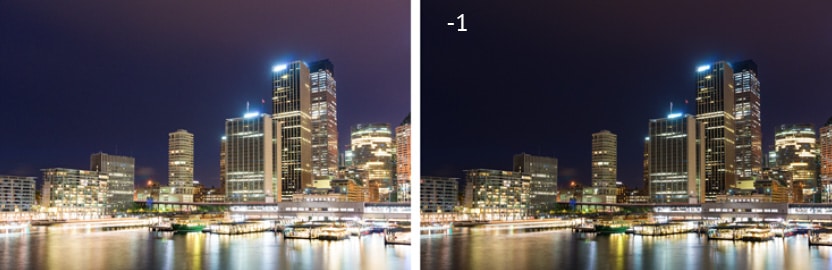
Night photography often needs -1 exposure setting
Cameras will usually try to brighten night scenes, causing them to look washed out. To fix this problem, try -1 exposure so the darks look dark.
We hope this has given you some ideas on when to use your cameras exposure compensation setting.