If a photograph is overexposed there will be no detail in highlights. An overexposed image is harder to save (if at all) than an underexposed shot.
If highlights are blown out at the time of exposure, they will not hold any detail that is recoverable in post processing. There is usually nothing you can do to save the image. On the other hand, an underexposed image often contains much detail in the darker areas photo that is recoverable in post processing.
The ideal situation is to wait for the right light. This may mean getting up well before sunrise to be at the destination before the sun becomes a problem. Likewise in the evening at twilight, where the fading light is perfect. Yet there are times when you will undoubtably be in the right place at the wrong time of day. Do you miss the shot because the lighting isn’t perfect? Of course not.
Choosing the Right Exposure
There will be times when a landscape photographer must underexpose the foreground to ensure that the sky is not overexposed or blown out. Firstly, you can manually set your exposure one or two stops under zero and lighten the darker area later on in post processing, drawing out the shadows.
You can also ensure a good exposure by using the bracketing function that most cameras have built in, where the camera takes 3 shots at -1, 0, +1 exposure increments and you merge the images in post processing. When using bracketing you must ensure your camera is on a tripod as the smallest movement between shots will be noticeable. Bracketing therefore gives one exposure for the highlights, one neutral exposure and lastly an exposure for the darker areas of the scene. If your camera does not have the bracketing feature, you as the photographer can bracket shots yourself and merge the images later in post processing.
Another option for the photographer is to compose the scene so that you don’t include the sky in the image. You can also use a polarizing filter or as many professional photographers choose to do, use graduated neutral density filters to darken the sky.
The important thing to remember is that blown out highlights will attract the viewers eye to that area of a scene. This is not usually where the landscape photographer wants the viewer to look.
Keeping Detail in Highlights
You can keep detail in highlights by exposing for the highlights, which may mean underexposing other areas of an image.
Now how do you actually go about achieving that if you haven’t got filters, or don’t want to compose to cut out the highlight area of the scene?
- Firstly set your camera to manual mode.
- Point your camera at the highlight area, just as if you were going to actually make that the point of interest, press the shutter button halfway down and zero the exposure line.
- Recompose the shot the way you would like the scene to look in your final image.
- Do not touch the exposure line or readjust the exposure in anyway.
- Take the shot.
You will have dark areas in your image due to those areas being underexposed, this is recoverable in post processing. On the other hand the highlights will have detail and that is what you are trying to achieve.
If the blown out highlight is the sun itself and the sun is an integrable part of the scene, then this usually proves to be nigh on impossible to fix. You may just have to accept the fact that there is a blown out highlight to your image and because it is the sun, most viewers won’t be too fussed anyway.
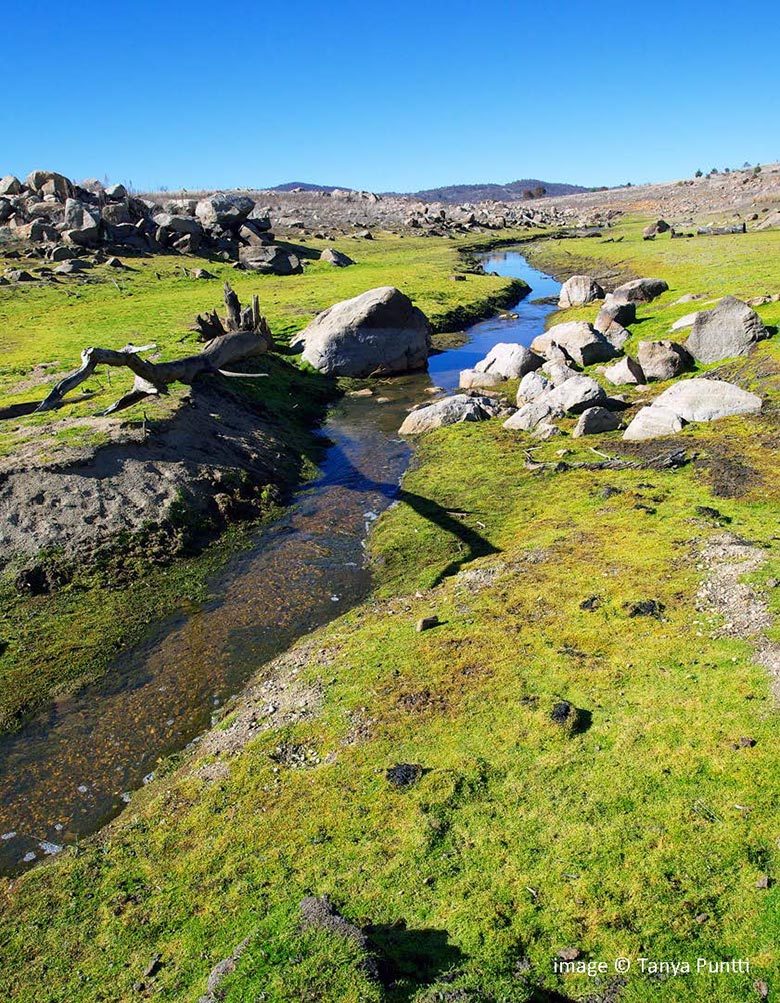
How I Took The Image Above
In the image above, the sun was in the sky and blowing out the white rocks in the foreground. I positioned myself to eliminate the sun, yet still used the creek as a leading line to guide the viewers eye through the image. I took a reading for the exposure on the rocks and zeroed the exposure line. Finally I recomposed the focal point one third into the image and took the shot. This particular image has sold many times over on stock photography sites.
Sign-up for our online photography course and learn how to master your digital camera in easy to understand “at your own pace” lessons.
Click here for more information and sign-up details