Dodge and burn is a photography editing technique that originated in the dark room. Using this technique in Photoshop today is quick and easy utilizing the 50% Grey layer method.
You can rescue an otherwise throwaway image just with dodge and burn, which can also be used on many other images to enhance the dark shadows and highlights which will make your photos, from landscapes to portraits, really pop.
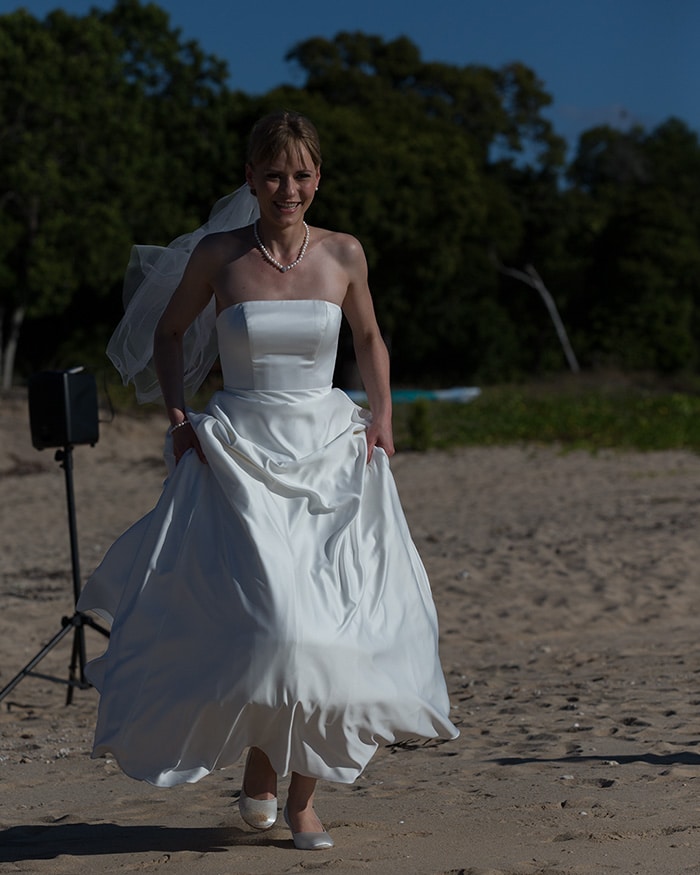
This is a really simple Photoshop technique to learn and I’ll run through this quickly on an image that just didn’t get the lighting correct. I didn’t want to throw this image away yet as I love the look of excitement on the brides face. I just need to lighten the brides face a little so we can see the beautiful smile more easily.
This type of situation is quite common for wedding photographers, where the light is just not in the right position. The dodge and burn technique is ideal for this type of photo. Find more Photoshop tricks here!
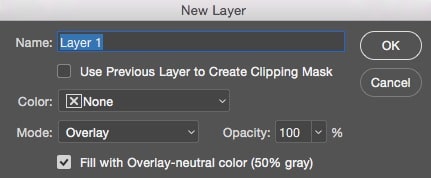
- With your image open in Photoshop Make a New Layer (Layer/New)
- In the window that pops up change the Mode from Normal to Overlay
- Check (or tick) Fill with overlay – nuetral color (50% grey)
- Make sure your background/foreground colors are black and white (Key D)
- Select a soft brush at 10% opacity
- Hit key x to use the white brush and lighten any highlight areas you need brighter. Each brush stroke is at 10% opacity so you may need more passes to increase the brightness.
- Hit key x to change to black and darken any areas you would like a darker look
- Click the grey layer eye icon on and off the see your dodge and burn work and the difference it can make to your image

Final Dodge and Burn
That’s how easy it is to dodge and burn using Photoshop and the overlay blend mode. All that’s left for you to do now is flatten the image and save it.
Professional photographers have been using this simple technique for many years. Dodge and burn works particularly well with both color photographs or black and white. The amount of darkening or lightening is entirely up to you. The objective is always to make your image look the way you would like to it to be. There is no right or wrong when it comes to image editing.
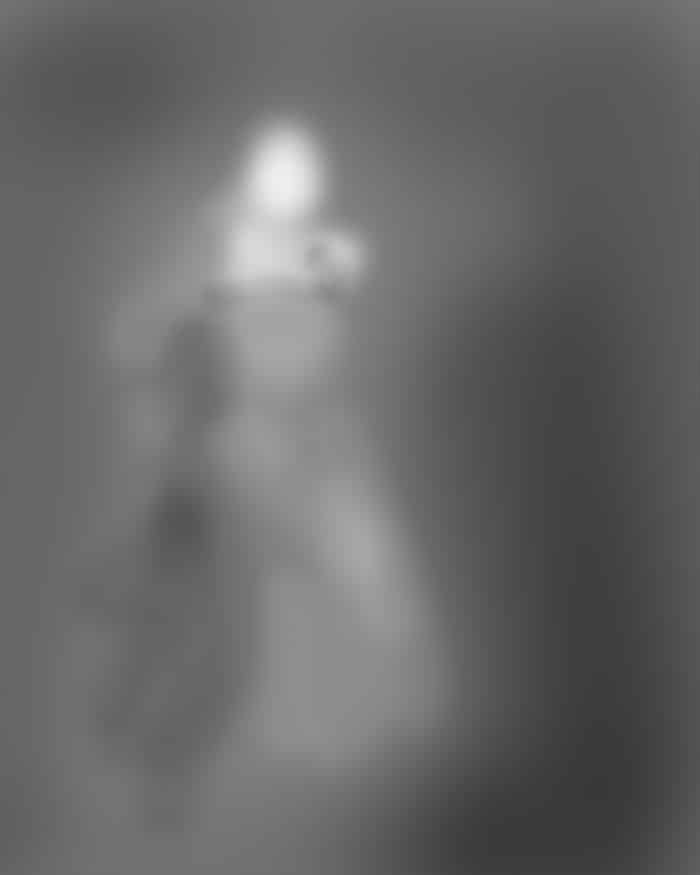
If you want to see where you have dodged and burnt on the grey layer, switch the mode back to normal and you will get a somewhat ghostly image which shows your black and white brushstrokes.
Sign-up for our online photography course and learn how to master your digital camera in easy to understand “at your own pace” lessons.
Click here for more information and sign-up details