Do your photos ever look grainy, blurred or not as sharp as you’d like? Here are our best tips on how to take sharper photos than you ever thought possible.
Tripods
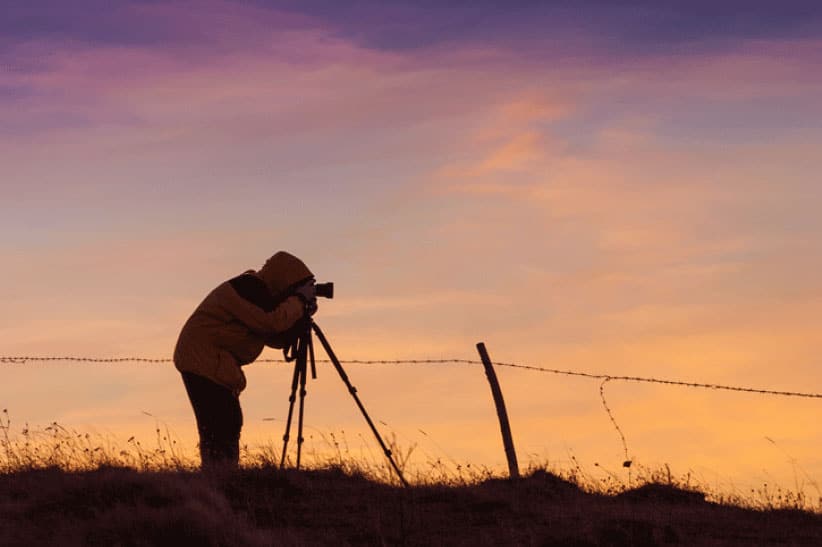
If you move even in the slightest when taking a photo, your image can appear blurred due to camera shake. This is especially true when photographing in low light such as sunset, sunrise, indoors or in overcast weather.
When shooting in low light your camera needs a slow shutter speed to expose the scene correctly. i.e the lower the light, the slower the shutter speed. The slower the shutter speed, the more chance of camera shake when hand holding.
If you have a tripod, be sure to use it. This one tip alone will show you how to take sharper photos. If you haven’t got a tripod, look for a solid surface to place your camera. When you’re using a tripod, it’s a good idea to use a remote release to trigger the shutter button so that you don’t have to touch the camera at all. If you don’t have a remote, you can use the delayed timer built into the camera.
A delayed shutter is a function that tells the camera to wait a few seconds after you push the button before it takes the picture. I recommend setting it to ten seconds. This will give the camera time to steady itself once you press the shutter and remove your hand.
When using a tripod, it’s also important to turn the vibration reduction / image stabilisation switch on the side of your lens to OFF position (if it has one). If your camera searches for vibration and doesn’t find it, the act of searching for it can in turn cause vibration.
Focus Points For Sharper Photos
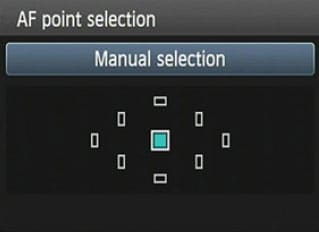
Set a single focus point so you choose specifically what to focus on. Take control over how to capture sharper photos, don’t allow your camera to do this for you! This is especially important if you zoom your lens in to get a closer shot.
If you half press your shutter button to focus and your camera randomly selects focus points, choosing different areas every time you press it, chances are you are not selecting it yourself. This can often cause your camera to focus on something else other than your subject.
To fix this problem, I recommend setting a single focus point, adjusting it manually so it’s positioned over your main subject. If you look through your rear view and half press the shutter button, you should only see one focus point turn red (or green) depending on your camera model.
If you’ve read your camera manual and still don’t know how to set a single focal point, ask in our Private Facebook Group (students only) so we can advise further.
Shutter Speed
Check your shutter speed is fast enough to compensate for moving subjects. For example, if you are photographing children, people walking, or slow animals, your shutter speed needs to be 1/250 second minimum. You may get away with 1/200 second if the person is sitting still for a portrait shot. For fast moving subjects, you may need 1/400 second or more for sharp photos, depending on the speed of the subject.

When learning how to take sharper photos, the more you photograph moving subjects, the easier you’ll automatically recall what shutter speed they require.
If you are just starting out, I recommend setting shutter speed priority mode with auto ISO. Set 1/200 speed to start with and take a test shot. If the subject is blurred, increase the speed by 1/100th of a second faster until you see the result you are after. In other words, try 1/200sec, 1/300sec then 1/400sec until you are capturing a sharp shot. This is by far the easiest way to understand shutter speed.
Depth of Field
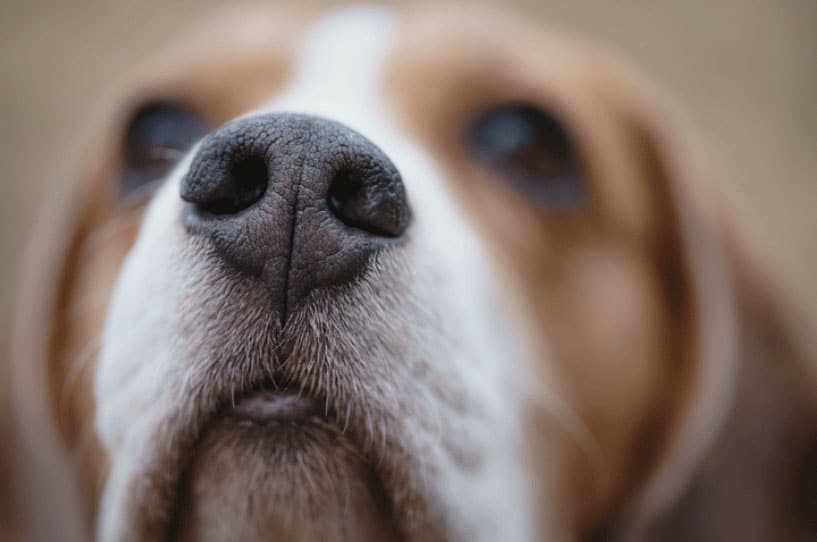
Check that your aperture f/number is set high enough to capture the subject in full focus (presuming this is your intention). Again, this is even more important if you zoom your lens in to get a closer shot. For example, if you are photographing your pet dog and you find the nose is in focus but the eyes are blurred, then increase the aperture f/number one stop at a time until you get the results you are after. If you initially set f/2.8, next time try f/4.6 aperture.
Minimum Focal Distance
Don’t stand too close that your lens can’t focus. Every lens has a minimum focal distance. The minimum focus distance is the shortest distance at which a lens can focus. Standing closer than the minimum focal distance will result in a blurry subject. If your lens is having trouble focusing, take one or two steps back and try again.
Reduce Grain
Where possible, avoid grain / noise as it degrades the quality of your photos, reducing the sharpness and clarity. Have you ever noticed that your night photos often look grainy? This is because the camera tends to use a higher ISO setting to create a brighter exposure. The disadvantage of a high ISO setting is that it results in grainy images which in turn reduces sharpness.
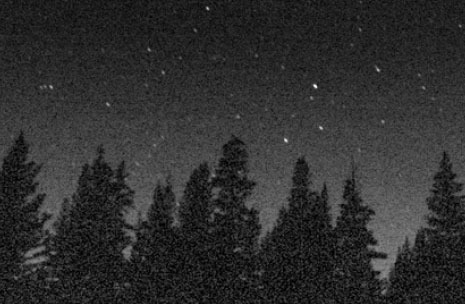
The best way to avoid grain is to keep your ISO set to 100 or 200 when photographing in low light. This will result in a much slower shutter speed, so you’ll also need to use a tripod and remote release. However the images will be much cleaner and sharper, and a huge step in learning how to take sharper photos.
Set Manual Mode and tell the camera you want a darker exposure by setting the exposure line to -1. This will make the shadows appear pure black, preventing the camera from trying to brighten up and show detail in the shadows which results in grain. In other words, expose for the shadows to be dark.
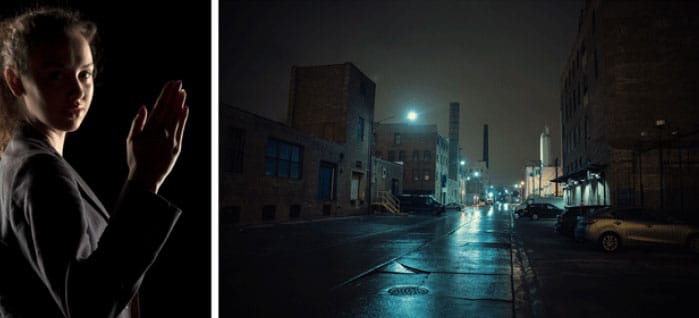
Sharper Photos In Low Light
The real challenge in low light is how to take sharper photos of moving subjects . When a subject is moving, for example taking a portrait indoors or at night, you’ve learned you need to keep the shutter speed at 1/200 or thereabouts. In low light, this often means you need a low aperture f/number (for example f/2.8) coupled with a high ISO (1600 or higher).
A clean 100 or 200 ISO isn’t going to be sufficient in keeping the shutter speed high enough to avoid motion blur from your subject. Of course this is presuming you don’t want to use your flash.
The first setting I recommend adjusting is the shutter speed. I find if people are sitting still, I can use 1/120sec and end up with a good number of sharp shots.
The next setting to look at is your aperture. Opening the lens to aperture f/2.8 allows in more light than say f/4.6. If you intend on doing a lot of low light photography I recommend investing in a lens that allows you to shoot at f/2.8. Nifty fifties are perfect for this and you can pick them up for as little as $200 nowadays.
As we know, ISO 100 or 200 is cleaner from grain / noise than ISO 1600. While this is true, cameras nowadays can handle high ISO much better than earlier models. I recommend experimenting with ISO to see for yourself how far you are willing to push your ISO yet still be happy with the result.
For example, I personally find ISO 1600 is acceptable for my camera model. Note, each camera is different. To begin with, try ISO 640, 800 and 1600 then compare the results on your monitor.

Positioning
How many times have you taken a photo from a distance and expected the subject to be in sharp focus? DLSR cameras are good, but they are not yet that good! If you want a sharp shot of your subject, you need to find a way to physically move closer or zoom in closer with a longer telephoto lens.
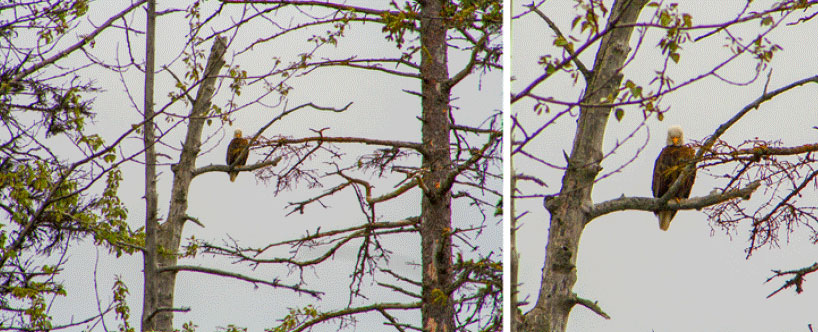
Cropping an image that was taken from a distance, will never give you the same detail as the photo below. In this image the photographer positioned themselves closer to the bird, using a telephoto zoom lens to fill the frame as much as possible with the subject.

Conclusion: How to Take Sharper Photos
While learning how to take sharper photos, if you are zooming in to look at the photo at 100% crop (or more) on your computer monitor and judging the sharpness of the image that way, then I’m afraid to say you’ll never be happy with your photos. This is called Pixel Peeping – Why You Shouldn’t Do It .
Let’s face it, if we were to walk up close to a famous painting in a museum and study it pixel by pixel you’d find irregularities in the brush strokes, problems with colour and skewed lines. So why do we do it with photographs?
Similar to paintings in a museum, photographs are meant to be viewed as a whole, and from a certain distance. Hence I have learned to never go beyond a 50 percent crop when judging the sharpness of photos on my monitor.
If you were wanting to fairly judge an image at 100 percent zoom, you’d need to also change the resolution of your monitor to match that of the image, so you can view the photo as a whole on your screen. The problem being, there is no monitor I can think of that could actually do that!
The largest my desktop monitor goes to is 2560 x 1600 pixels and my laptop 1440 x 900.
On September 5, 2014 Dell unveiled ‘the world’s first’ monitor with 5K resolution, shortly followed by Apple when they released a new iMac with same size and 5120 x 2880 resolution.
With many entry model DSLR cameras now utilising 24MP sensors, you’d need a monitor resolution of 6000 x 4000 pixels to display images at 100 percent, yet still enable you to view them as a whole. Only then could you judge the sharpness fairly at 100 percent.