Applying the technique for blending multiple exposures doesn’t take a long learning curve. Using this photography skill will make a huge difference on many difficult lighting scenarios.
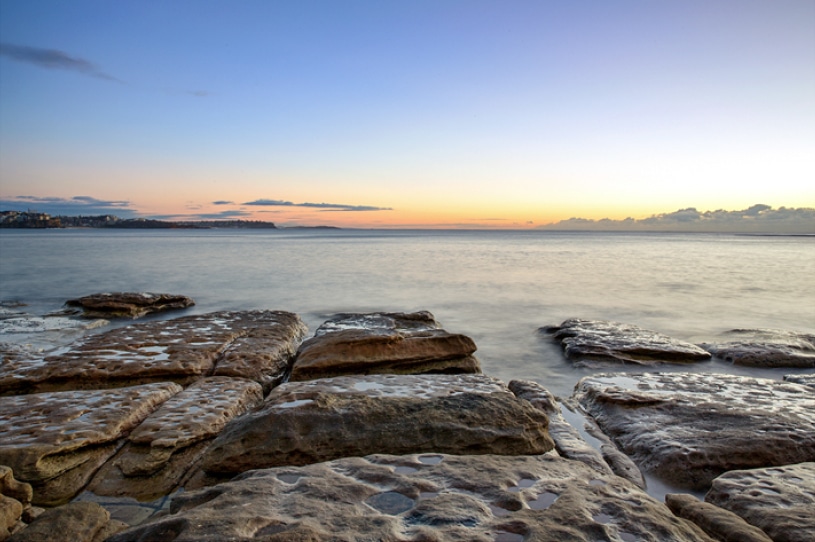
During a trip to Sydney last year we discovered the perfect place for a long exposure sunrise shoot. Pre dawn the next morning we walked along Manly foreshore, clambered down onto these rocks and set up our tripods. I chose this place because I loved the texture in the rocks. I also knew from past trips that the sky would have great colour in it as the sun started to rise.
The problem with these kinds of scenarios is that the darker rocks often require a much longer shutter speed than the brighter sky. i.e if I expose for the sky, the rocks are too dark. If I expose for the rocks, the sky is too bright and loses much of its colour as shown in the examples below. (original images straight out of camera)
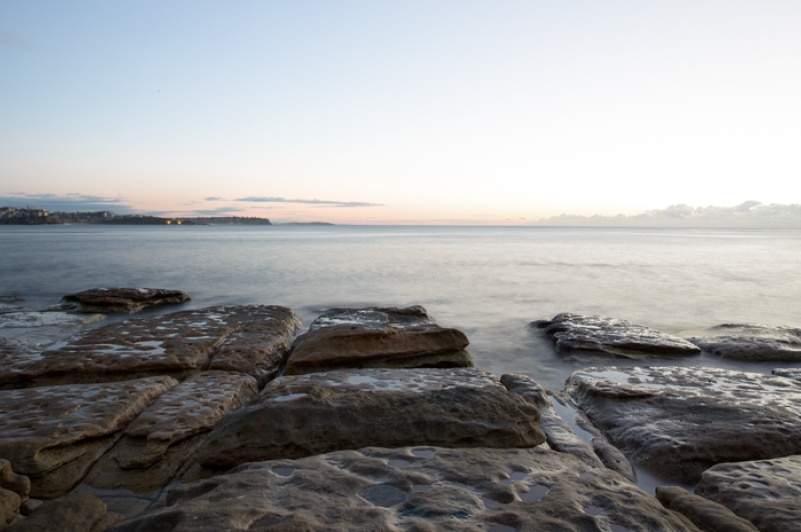
Exposing for the rocks in the foreground above, lost the great colour I saw in the sky.
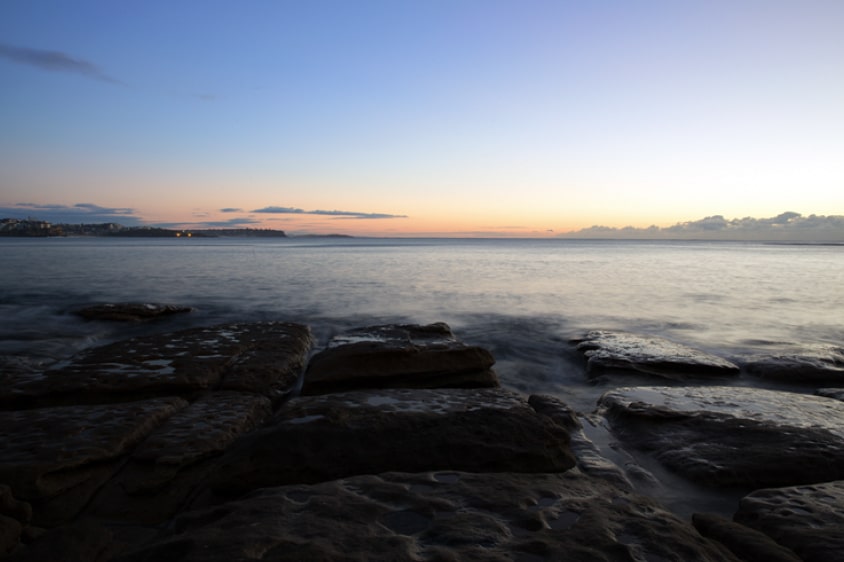
Metering for the sky captured the colour, but left the rocks underexposed. This is actually normal due to the rocks being much darker in light than the brighter sky. You’ll have similar results for any scene where there is a wide contrast between shadows and light. So what’s a photographer to do?
Finding a Balance
It’s not unusual to see beginners trying to find a middle ground i.e they’ll keep adjusting settings until they find an exposure where the sky isn’t too bright nor the rocks too dark.
When it comes to sunrises you don’t normally have a lot of time to figure this out. If you’re wanting to try this method, I’d expose for the brighter part of the scene first (the sky), zeroing the exposure line in manual mode. Then take another shot on +1 and a third on +2, lightening the foreground rocks a little more with each shot. This way when you are back at your PC, you’ll have a series of images from which to choose from. Note, it’s best not to rely on your cameras LCD screen.
Drawing out Shadows
Another solution is to expose for the brighter part of the scene. If you are shooting in RAW file format you can bring out the details in the shadows later on in post processing.
No doubt this is the easiest method. Much easier than blending multiple exposures. However I have a love hate relationship with it. You can never guarantee the quality of the shadow areas after you’ve lightened them. The amount of digital noise you see in the colours of the lightened areas very much depends on the quality of your camera.
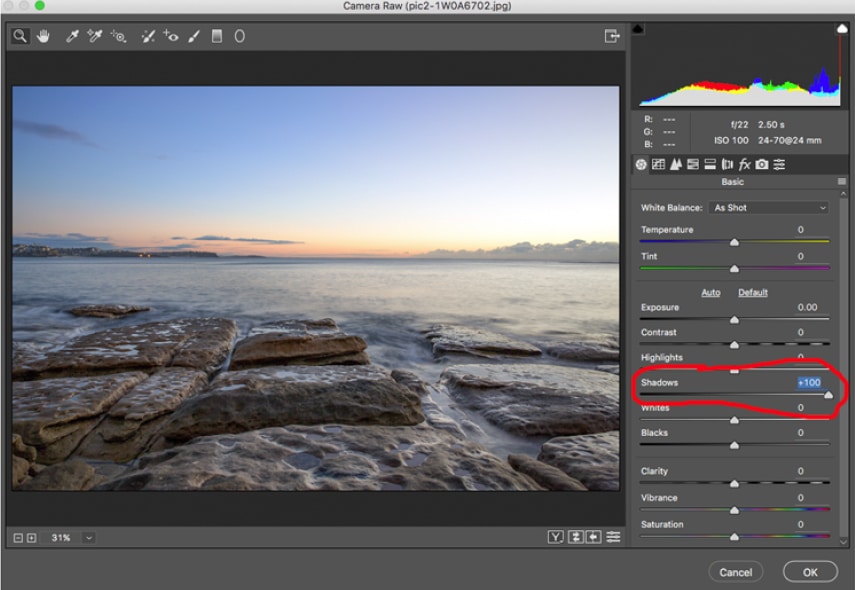
Note when using this method, I said to expose for the brighter part of the scene when taking the shot. This is because it’s much easier to recover details in underexposed subjects than it is to bring back details in overexposed areas. If you wash out the sky colour, chances are you won’t be able to bring it back in post processing. Yet if you underexpose the rocks, all you need do is use the ‘Shadows’ slider in your RAW file editor to brighten them.
Taking and Blending Multiple Exposures
A third solution (my personal preference) is to shoot two exposures. The first shot exposing for the sky, and a second for the foreground rocks. Then blending them together as one image in post processing. To use this technique you’ll need software that allows you to layer one image on top of the other. For the image below, I opened Photoshop and placed the image with the well exposed sky on top of the version with the lighter rocks. Next I applied a layer mask and brushed off the top layer along the bottom half to reveal the lighter rocks beneath.
Next time you see a long exposure taken at sunset or sunrise with textured foreground interest, chances are it was done using this method. Blending multiple exposures to create a single image.