What is RAW file format and how do you use raw photographs.

Furthermore, even before the editing stage, your digital camera compacts the image into a smaller file when it saves JPG format. Therefore loosing all the raw information that was originally gathered by the camera.
However, if you set your camera to save in RAW CR2 then all the data is kept in tact.
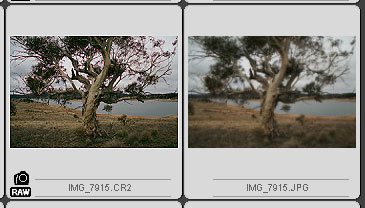
Take this image below for example. It is a desktop picture taken from a raw editing program showing both the JPG and raw CR2 file side by side. It’s clear to see how much data is lost in the JPG on the right. If your image is destined to be printed. Then it’s recommended to open the RAW CR2 file and save it as a TIFF file before printing. TIFF files also keep a high percentage of the data’s quality when compared to JPG.
JPG is really only recommended for website viewing due to its fast loading, small file size.
Another way to think of RAW format is to being similar to negatives back in the eighties. It didn’t matter if you damaged the photograph back then because you knew you could pull out the old negative and have it printed again. The same goes with RAW format.
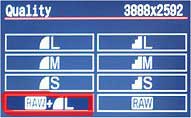
Whenever possible use RAW format or if you own a Canon digital SLR camera change the settings to JPG + RAW. What this does is it saves each image in two different file formats, one jpg and one raw. Then you can digitally edit the jpg as many times as you want, knowing that you can re-save an original copy from the raw file if needed in future.
How to convert and edit RAW files?
If you need to convert a raw file into a jpg so you can use it on a website or have it printed, then you need a conversion software package that can read this format. Chances are, if your DSLR camera has a raw file option, then your purchase should also have included a raw software package on a CD. For example Canon offers with each SLR camera a copy of Digital Photo Professional. If you purchased your camera second hand, then you can download 3rd party conversions like Photoshop Camera Raw plug-in.
Other advantages to setting your digital SLR camera to RAW
Another advantage to using RAW is that you don’t need to have your camera’s white balance or picture style etc set perfectly when you take the actual photograph. Instead you can change this later on using a RAW editor. This is particularly useful for beginners who may forget to change their picture style from portrait to landscape when going from one particular subject to another.
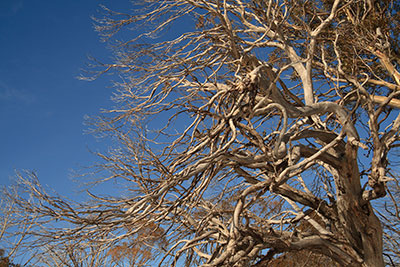
When I took the first photograph shown below, I’d forgotten to change my white balance from the day before. As you can see the ‘shade’ white balance setting wasn’t suitable for this particular day which resulted in the tree having an off orange tinge to it. Had I taken the photograph in JPG format, I would have been stuck with this image as it is.
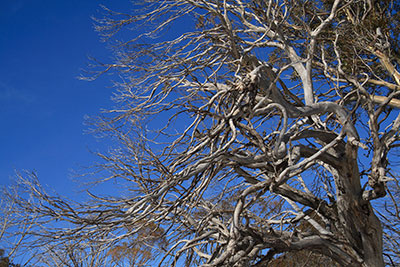
Luckily I photographed in RAW format so could open the file in my editor and change the color balance to ‘daylight’. This resulted in a much better color tone in the tree.
Disadvantages to shooting in RAW
Like most things, there are also some disadvantages that must be taken into account when setting your digital SLR camera to photograph in RAW format. RAW CR2 files are very large and take a lot of space on your cameras memory card and on storage disks. If you plan on shooting in this mode then I recommend having at least two 4gig memory cards for your camera. Backing photo’s up on DVD disks instead of CD will also let you save more images per disk.
Having a fast computer on which to edit the RAW files is also a necessity. If you own a 5 year old computer you might find it takes an hour just to open your folder of RAW files. Other than that, shooting RAW is the only way to go.


