Professional photographers normally set their tripods up and use a spirit level to make sure their horizons are dead straight when taking landscape photographs. This way they never have a crooked horizon. Right?
Wrong. They may do that sometimes, but like most photographers everywhere, if they have a horizon tilted either left or right they use Photoshop to correct the mistake.
Above we have an image where the horizon is tilted to the right, certainly looks odd and throws the photo out of balance. Don’t throw the image away as this can be easily straightened. Let’s show you how to fix crooked horizons.
Step 1
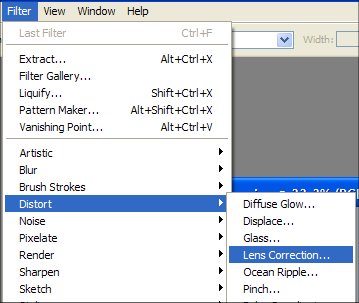
With your image opened in Photoshop, select:
- Filters from the top tool bar
- Distort
- Lens Correction
 Step 2
- Select the second tool from the left tool bar
- This is the Straighten Tool which can also be accessed with the keyboard short cut by pressing A
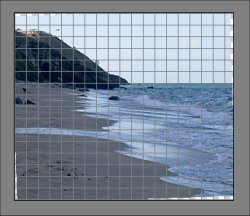
Step 3
- Click on the edge on your image at the horizon
- Hold the left mouse button down and drag a line across your image following the horizon
- Let the mouse button go and the Lens Correction Tool will straighten the horizon
- Click OK and return to the main work palette.
Step 4
- Merge the layers (Layers – Flatten Image)
Step 5
- Crop your image to suit cutting out the edges that are now not needed within the whole picture
- save your image or continue with other Photoshop elements.
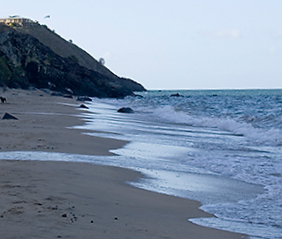
There you go. The horizon is now straight and the image looks balanced. Time to go for a dip after all that hard work.