Here are some great tips for using bokeh and DOF (depth of field) within a photographs composition.
Note, sometimes ‘bokeh’ will also be spelt as ‘brokeh’ by those not fully familiar with the term. ‘Bokeh’ is what you can achieve with a prime lens. While ‘Brokeh’, on the other hand, is what your wallet looks like when you buy that expensive lens! (Get it … the lens costs so much, you’re broke eh?) Ok, I’m not that good at jokes 🙂
What is bokeh and DOF?
Depth of field (DOF), refers to the area of an image that is in focus. You have most likely seen images where the main subject is in focus, while the background is out of focus or totally blurred. The area that covers the focused area is the DOF (depth of field). Bokeh on the other hand, refers to the appearance of the light that is seen within the blurred part of the photograph. Bokeh and DOF are important to consider for photographs when you need the main subject to stand out on its own and not be lost in background distractions.
Isn’t Bokeh and DOF the same thing?
No, bokeh and depth of field is not the same thing, although they do work together.
- DOF is seen in a photograph where there is an obvious focus area, set against a blurred background or foreground.
- Bokeh on the other hand, refers to how your camera lens renders the light that is seen within the blurred parts of the image. Sometimes this can be soft or harsh circular shapes, or look like hexagons, depending on your lens design and aperture settings.
Digital SLR Camera settings for bokeh and DOF
Important steps to achieving blurred backgrounds with good bokeh in most circumstances, is to have:
- start with a low aperture or f number as it’s also known (see examples below)
- if you’re using a telephoto lens, zoom it out to the longest length
- move in so your physically as close to the subject as your lens will allow you to be, yet still focus properly
- photograph subjects where the background objects aren’t too close behind
- light of some sort, whether it be sunlight steaming through branches or street lights when doing a night portrait, will be helpful when shooting bokeh
Numerous examples of bokeh / DOF within photographs and explanations on how each was achieved
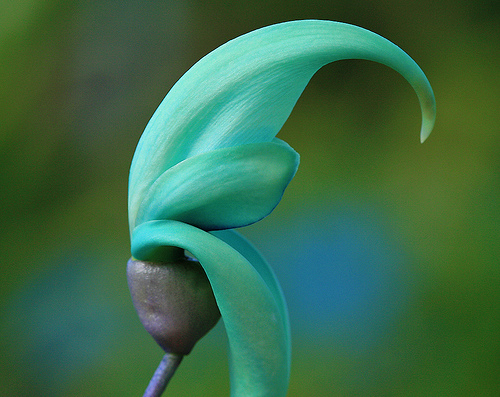
Jade Vine
Digital SLR Camera: Canon EOS 400D / Rebel XTi
DSLR Lens: Canon EF 100mm f/2.8 Macro
Exposure: 0.002 sec (1/640)
Aperture: f/5.6
Focal Length: 100 mm
ISO Speed: 400
Exposure Program: manual
Why the bokeh / DOF in this image worked
For starters, the aperture was kept to a low F number of f/5.6. Anyone who has seen a Jade Vine, will know that the flowers are tightly packed together. I was fortunate enough to have found one that had fallen to the ground. I picked the flower up and held it facing towards the main bunch when I took the shot, so that the colors could serve as a complementary background for my main subject.
It is also important not to be physically positioned too close to the main bunch. The further away from them, the better the bokeh effect. The background color is from the green part of the vine, where the blue is a result of light mixed with blue sky as seen through the vine.
It’s also important to note the softer circular shape of the blurred parts seen in the background. Whether or not your own bokeh will look this soft, may depend on the actual lens design. Each lens will render light differently. Take the next image below for an example, the photographer used the same aperture of f/5.6, yet the bokeh doesn’t appear as smooth. Having said that, it still makes an interesting effect.
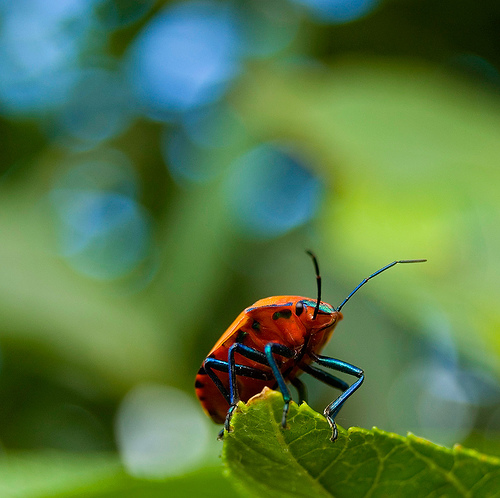
Example of insect with circular bokeh
Digital SLR Camera: Nikon D40
DSLR Lens: AF-S DX Zoom Nikor 18-55mm F/3.5- 5.6 G ED II (kit lens)
Exposure: 0.008 sec (1/125)
Aperture: f/5.6
Focal Length: 55 mm
ISO Speed: 200
Exposure Program: manual
Why the bokeh / DOF in this image worked
As mentioned earlier, the shape of the bokeh also depends on the lens design. Some DSLR lenses are considered to result in a nicer bokeh than others. Usually the more expensive the lens, the nicer the bokeh. However, in most cases if you shoot the photograph so you’re aiming towards some kind of light, then it will result in some form of circular bokeh like in the example above. In this case, there was sunlight shining through the leaves of the tree. This sunlight resulted in a circular bokeh. The blue color is caused from the blue sky above.

