You may have noticed that all subjects, especially light ones like snow, pick up a color cast from surrounding light. This is the reason why photos of snow taken in daylight under a blue sky often have a blue tinge.
One of the simplest ways to avoid the blue tinge and correct this is to set a custom white balance (Kelvin) in camera. Experiment between 7000 – 8000 degrees kelvin, take a shot and review it on your LCD screen. If it’s still too blue, increase the setting.
If you find your snow photos are now too red, decrease the setting and try again.
Setting White Balance
You could also try setting white balance to ‘shade’. Your camera will then automatically adjust the white balance to around 7000 degrees kelvin. By setting the white balance to shade the camera will automatically warm the image in camera and your snow photos should by whiter and brighter than before.
Alternatively if you shoot in RAW file format, simply leave the white balance setting on AUTO and adjust it later on with your RAW file editor. Sometimes in post processing you can simply click on the auto adjust button to eliminate the blue color cast.
One final tip
If you find your snow photoss are too dull or grey, try increasing your exposure compensation to +1 or +2 (refer to lesson 5 of our online photography course) to help give your snow photos some extra brightness. The exposure compensation feature is a powerful tool that can be used more often to overcome difficult lighting situations.
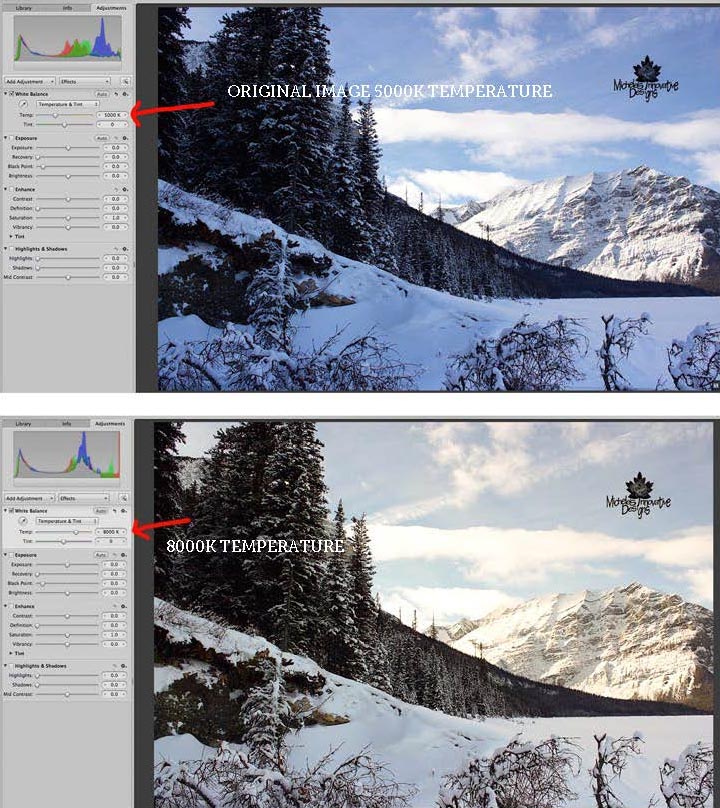
IMAGE © MICHELE SORTLAND (CANADA) ISO 400, 18MM, F14, 1/250
Used with permission.
Sign-up for our online photography course and learn how to master your digital camera in easy to understand “at your own pace” lessons.
Click here for more information and sign-up details